Installing the Platform on VMware vSphere VMs
Overview
This guide outlines the required steps for installing (deploying) an instance of the MLOps Platform ("the platform") to virtual machines (VMs) using the VMware vSphere virtualization platform (vSphere). When you complete the procedure, you'll have a platform instance running on your vSphere virtual environment. The installation is done by using the platform installer — Provazio.
- Provisioning (deployment) of the platform's node VMs is done by using a dedicated virtualization package, provided by Iguazio.
Don't attempt to provision the servers yourself prior to the deployment. - Platform shutdown should be coordinated with Iguazio's support team.
Don't shut down the data-node VMs non-gracefully, as this might erase the data.
Prerequisites
Before you begin, ensure that you have the following:
-
A Provazio API key and a Provazio vault URL, received from Iguazio.
-
Administrative access to the platform's vSphere cluster — an operational vSphere environment with one or more servers running the VMware ESXi hypervisor version 6.5, 6.7, 7.0 ("ESXi hosts").
-
A vSphere platform virtualization package with OVF and VMDK files for each of the platform nodes, received from Iguazio.
-
The ESXi hosts have data stores with a minimum of 400 GB available storage for each of the platform nodes (to be used for running the nodes' VM boot-disk images).
-
Sufficient dedicated physical resources on the ESXi hosts to allow running the platform's node VMs without over-provisioning.
-
At least two 1 TB enterprise-grade SSDs for each of the platform's data-node VM.
-
The platform's ESXi hosts have the following network interfaces:
- A single-port 1 Gb (minimum) NIC for the management network
- For hosting data-node VMs — a dual-port 10 Gb (minimum) NIC for the data-path (client) and interconnect networks
- For hosting application-node VMs only — a single-port 10 Gb (minimum) NIC for the data-path (client) network
Each network must be on a different subnet, and the management network's subnet must be able to accommodate allocation of IP addresses for each of the platform's node VMs.
-
User credentials for configuring management IP addresses, received from Iguazio.
-
A machine running Docker.
-
For installations without internet connectivity ("offline installation") —
Deployment Steps
To deploy an instance of the platform to a vSphere cluster, execute the following steps.
Step 1: Configure virtual networking | Step 2: Deploy the platform nodes | Step 3: Attach data disks to the data nodes | Step 4: Configure management IP addresses | Step 5: Run the platform installer | Step 6: Access the installer dashboard | Step 7: Choose the VM scenario | Step 8: Configure general parameters | Step 9: Configure cluster parameters | Step 10: Configure node parameters | Step 11: Review the settings | Step 12: Wait for completion
Step 1: Configure Virtual Networking
Follow the Configuring Virtual Networking (vSphere) guide to configure virtual networking on the platform's vSphere cluster.
Step 2: Deploy the Platform Nodes
Follow the Deploying the Platform Nodes (vSphere) guide to deploy a set of VMs that will serve as the platform's data and application nodes.
Step 3: Attach Data Disks to the Data Nodes
Follow the Attaching Data Disks to the Data-Node VMs (vSphere) guide to attach data disks (storage devices) to the platform's data-node VMs.
Step 4: Configure Management IP Addresses
Follow the Configuring IP Addresses (vSphere) guide to configure IP addresses for the management network ("management IP addresses") on the platform nodes, to allow the installer to connect to the node VMs.
Step 5: Run the Platform Installer
To deploy the platform in environments with an internet connection (online deployment), run the platform installer, Provazio, by running the following command from a command-line shell on a server or a machine that is running Docker and has connectivity to the platform's data and application nodes:
docker pull gcr.io/iguazio/provazio-dashboard:stable && docker run --rm --name provazio-dashboard \
    -p 8060:8060 \
    -e PROVAZIO_API_KEY=<Provazio API Key> -e PROVAZIO_VAULT_URL=<Provazio Vault URL> \
   gcr.io/iguazio/provazio-dashboard:stable
- API Key
- A Provazio API key, received from Iguazio (see the installation prerequisites).
- Vault URL
- A Provazio vault URL, received from Iguazio (see the installation prerequisites).
NoteDon't include a slash (`'/'`) at the end of the vault URL.
Step 6: Access the Installer Dashboard
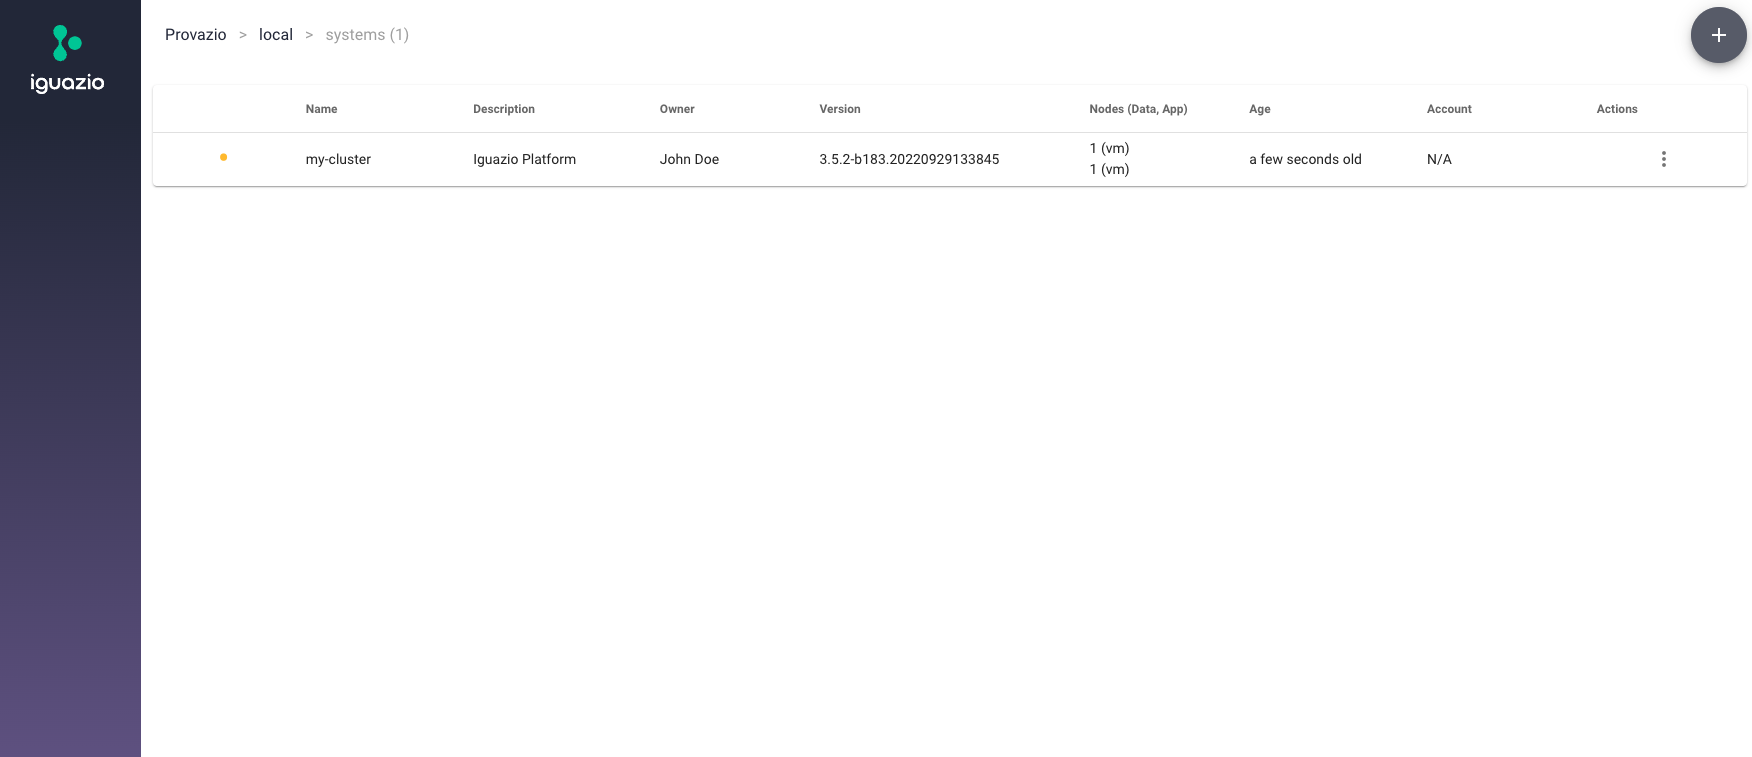
In a web browser, browse to localhost:8060 to view the Provazio dashboard.
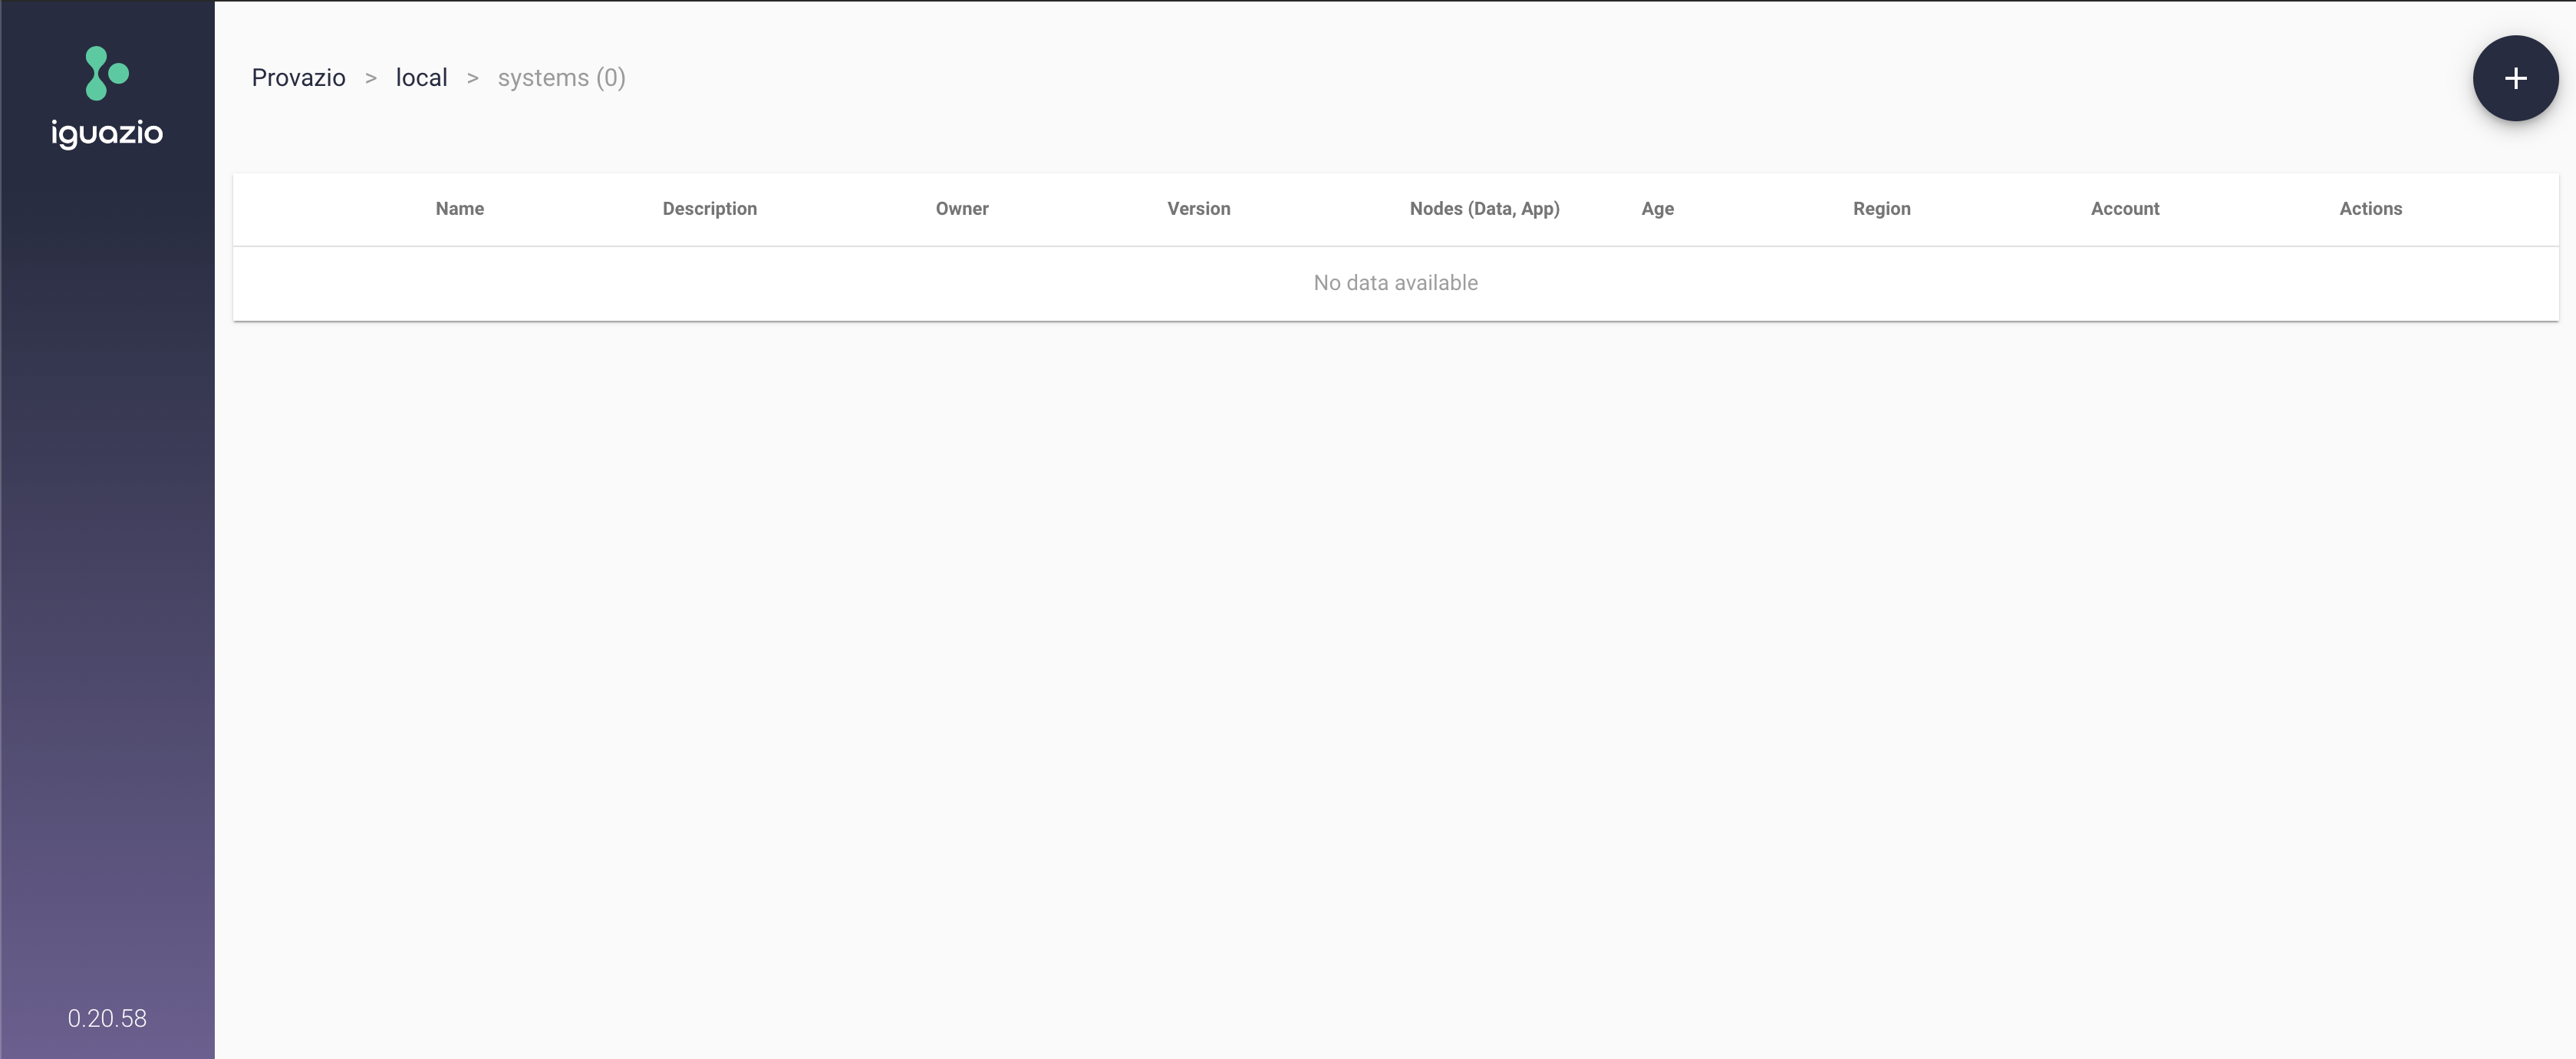
Press the plus-sign button (
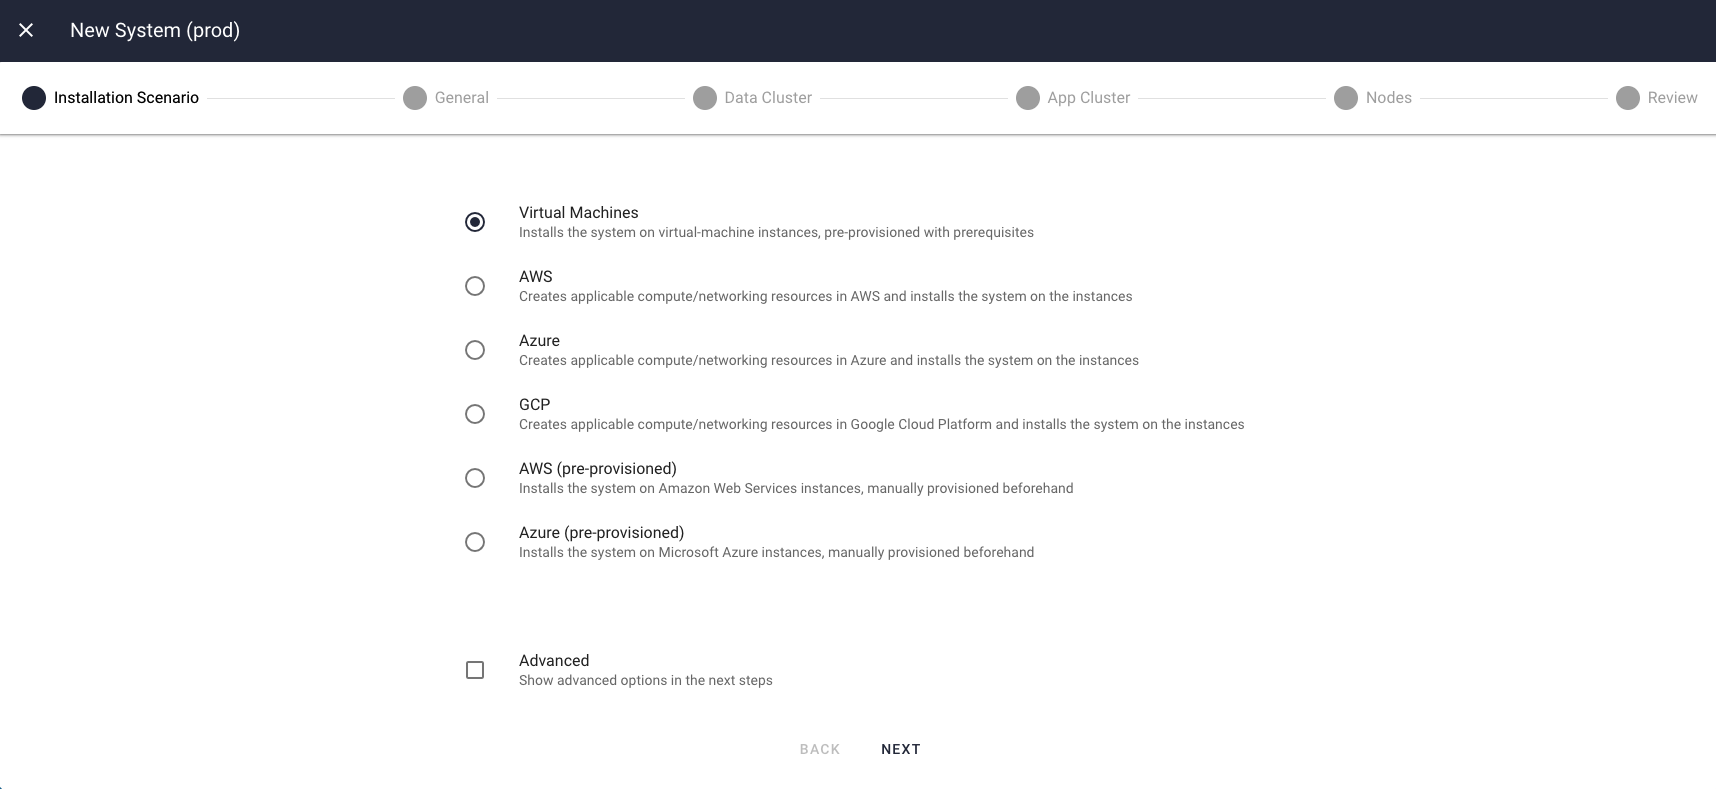
Step 7: Choose the VM Scenario
On the
Step 8: Configure General Parameters
On the
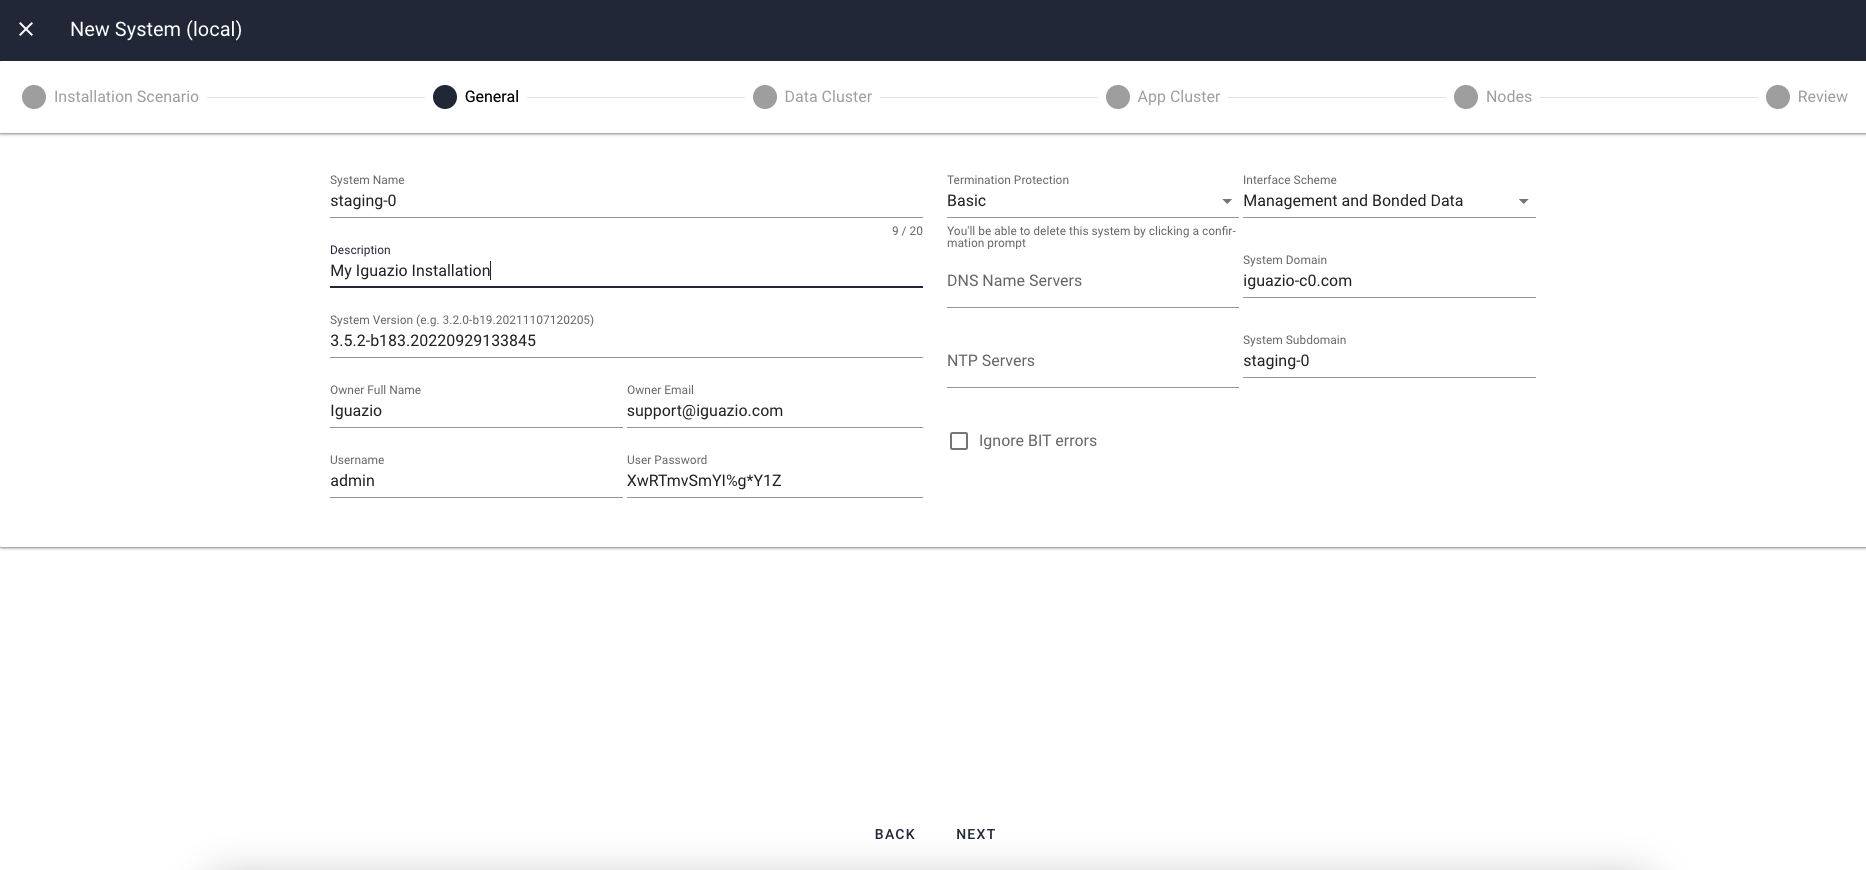
- System Name
- A system ID of your choice, which will be part of the URL of your platform instance.
- Valid Values: A string of 1–12 characters; can contain lowercase letters (a–z) and hyphens (-); must begin with a lowercase letter
- Default Value: A randomly generated lowercase string
- Description
- A free-text string that describes the platform instance.
- System Version
- The platform version.
- For online installations — insert the release build number that you received from Iguazio (for example, "3.5.5-nnnnn "). The installer implicitly downloads the appropriate installation package for the specified build version.
- For offline installations (in environments without an internet connection) — set the value of this parameter to "
file://igzconf:igzconf@<IP of the installation-package data node>:/home/iguazio/installer/<platform version, as received from Iguazio>"; replace the<...>placeholders with your specific data. Note that you first need to create a/home/iguazio/installer data-node directory and extract to this directory the platform installation-package archive that you received from Iguazio, as outlined in the offline-installation guide, which should have been executed in Step 5.
- Owner Full Name
- An owner-name string, containing the full name of the platform owner, for bookkeeping.
- Owner Email
- An owner-email string, containing the email address of the platform owner, for bookkeeping.
- Username
- Username for a platform user to be created by the installation. This username will be used to log into the platform dashboard. You can add additional users after the platform is provisioned.
- User Password
- Platform password for the user generated by the installation — to be used with the configured
username to log into platform dashboard; see the password restrictions. You can change this password after the platform is provisioned. - System Domain
- Custom domain (for example, "customer.com").
The installer prepends the value of the
System Name parameter to this value to create the full system domain. - Termination Protection
- The protection level for terminating the platform installation from the installer dashboard.
- Interface Scheme
- Choose one of:
- Management and Bonded Data: deploying with separate interfaces for the management network, the client network, and the interconnect network.
- Single Interface Deployment: deploy with one 10G interface that serves as management, client and interconnect network.
See more details in prerequisites.
Step 9: Configure Cluster Parameters
Common Parameters (Data and Application Clusters)
The following parameters are set for both the data and application clusters. Node references in the parameter descriptions apply to the platform's data-node VMs for the data cluster and the application-node VMs for the application cluster.
- Hypervisor
-
The hypervisor running on the cluster's hypervisor host machine.
For vSphere, select
VMware . - Resources
- The number of CPU cores and memory to allocate for each node.
Data-Cluster Parameters
On the
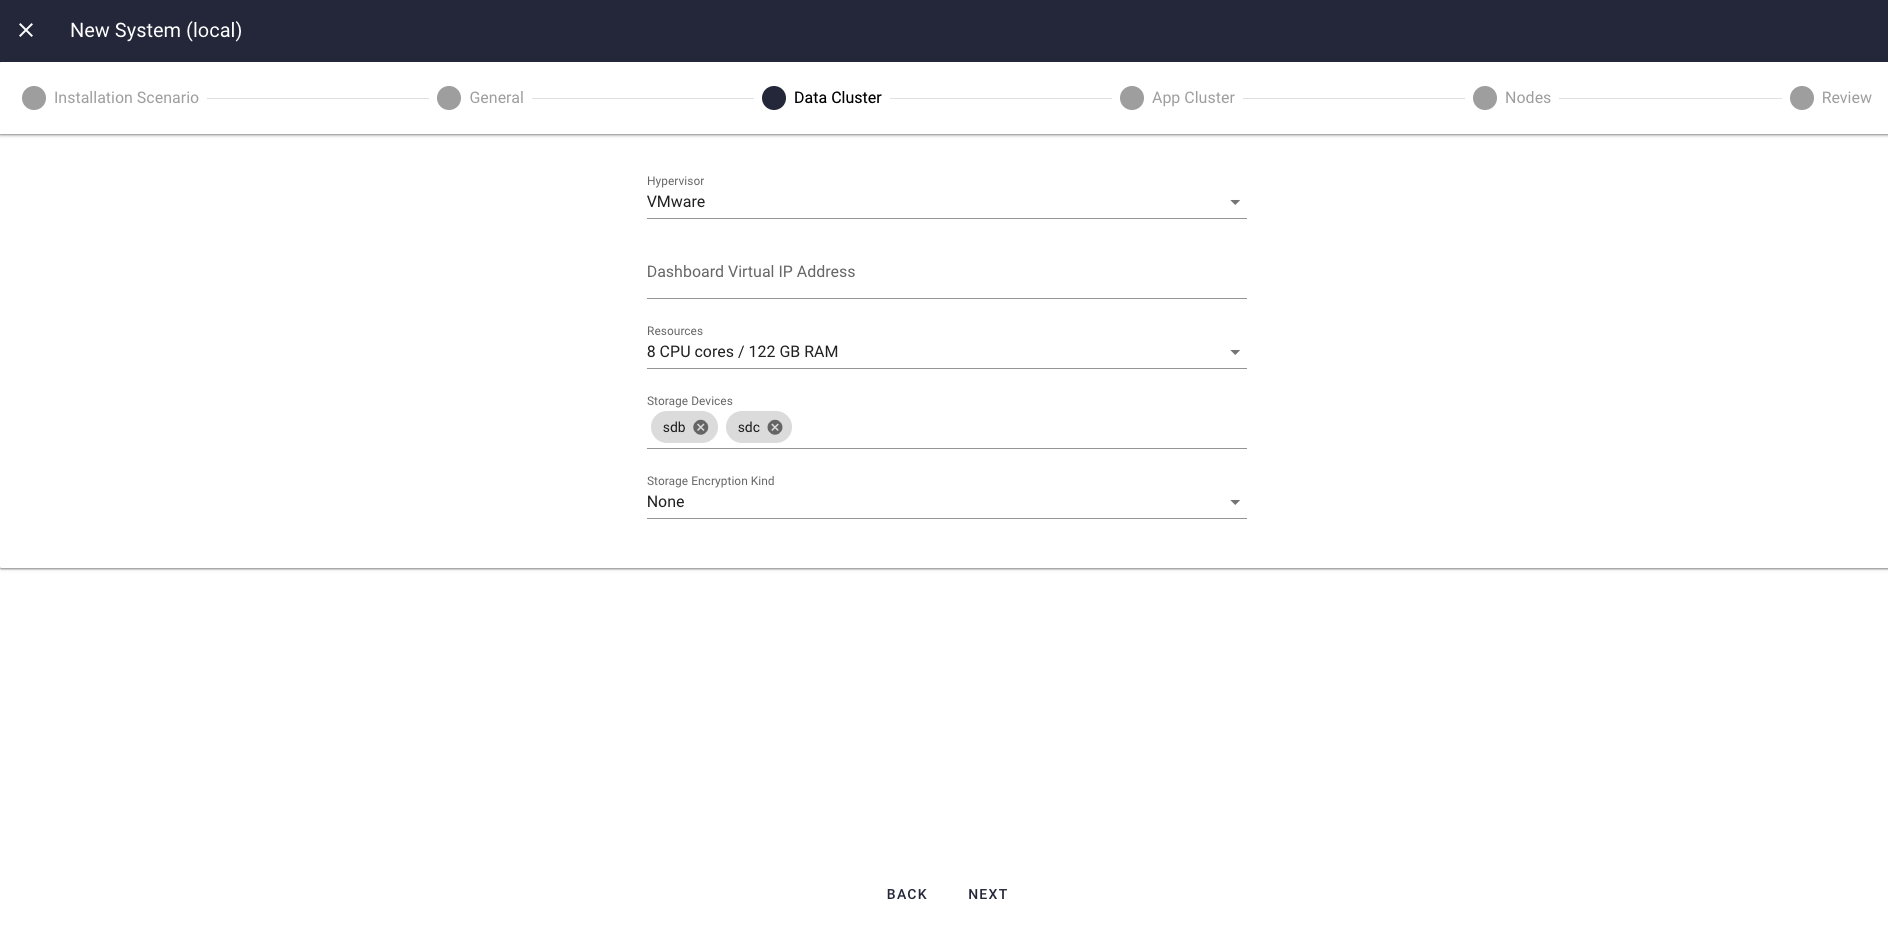
The following parameters are applicable only to the platform's data cluster:
- Dashboard Virtual IP Address
-
An IP address that is used internally to load-balance access to the platform dashboard.
Choose an available address from the subnet of the client network.
NoteThis parameter isn't required for platforms with a single data node.
- Storage Devices
- The names of the block-storage devices (data disks) that are attached to the data nodes, as configured in Step 3.
Application-Cluster Parameters
On the
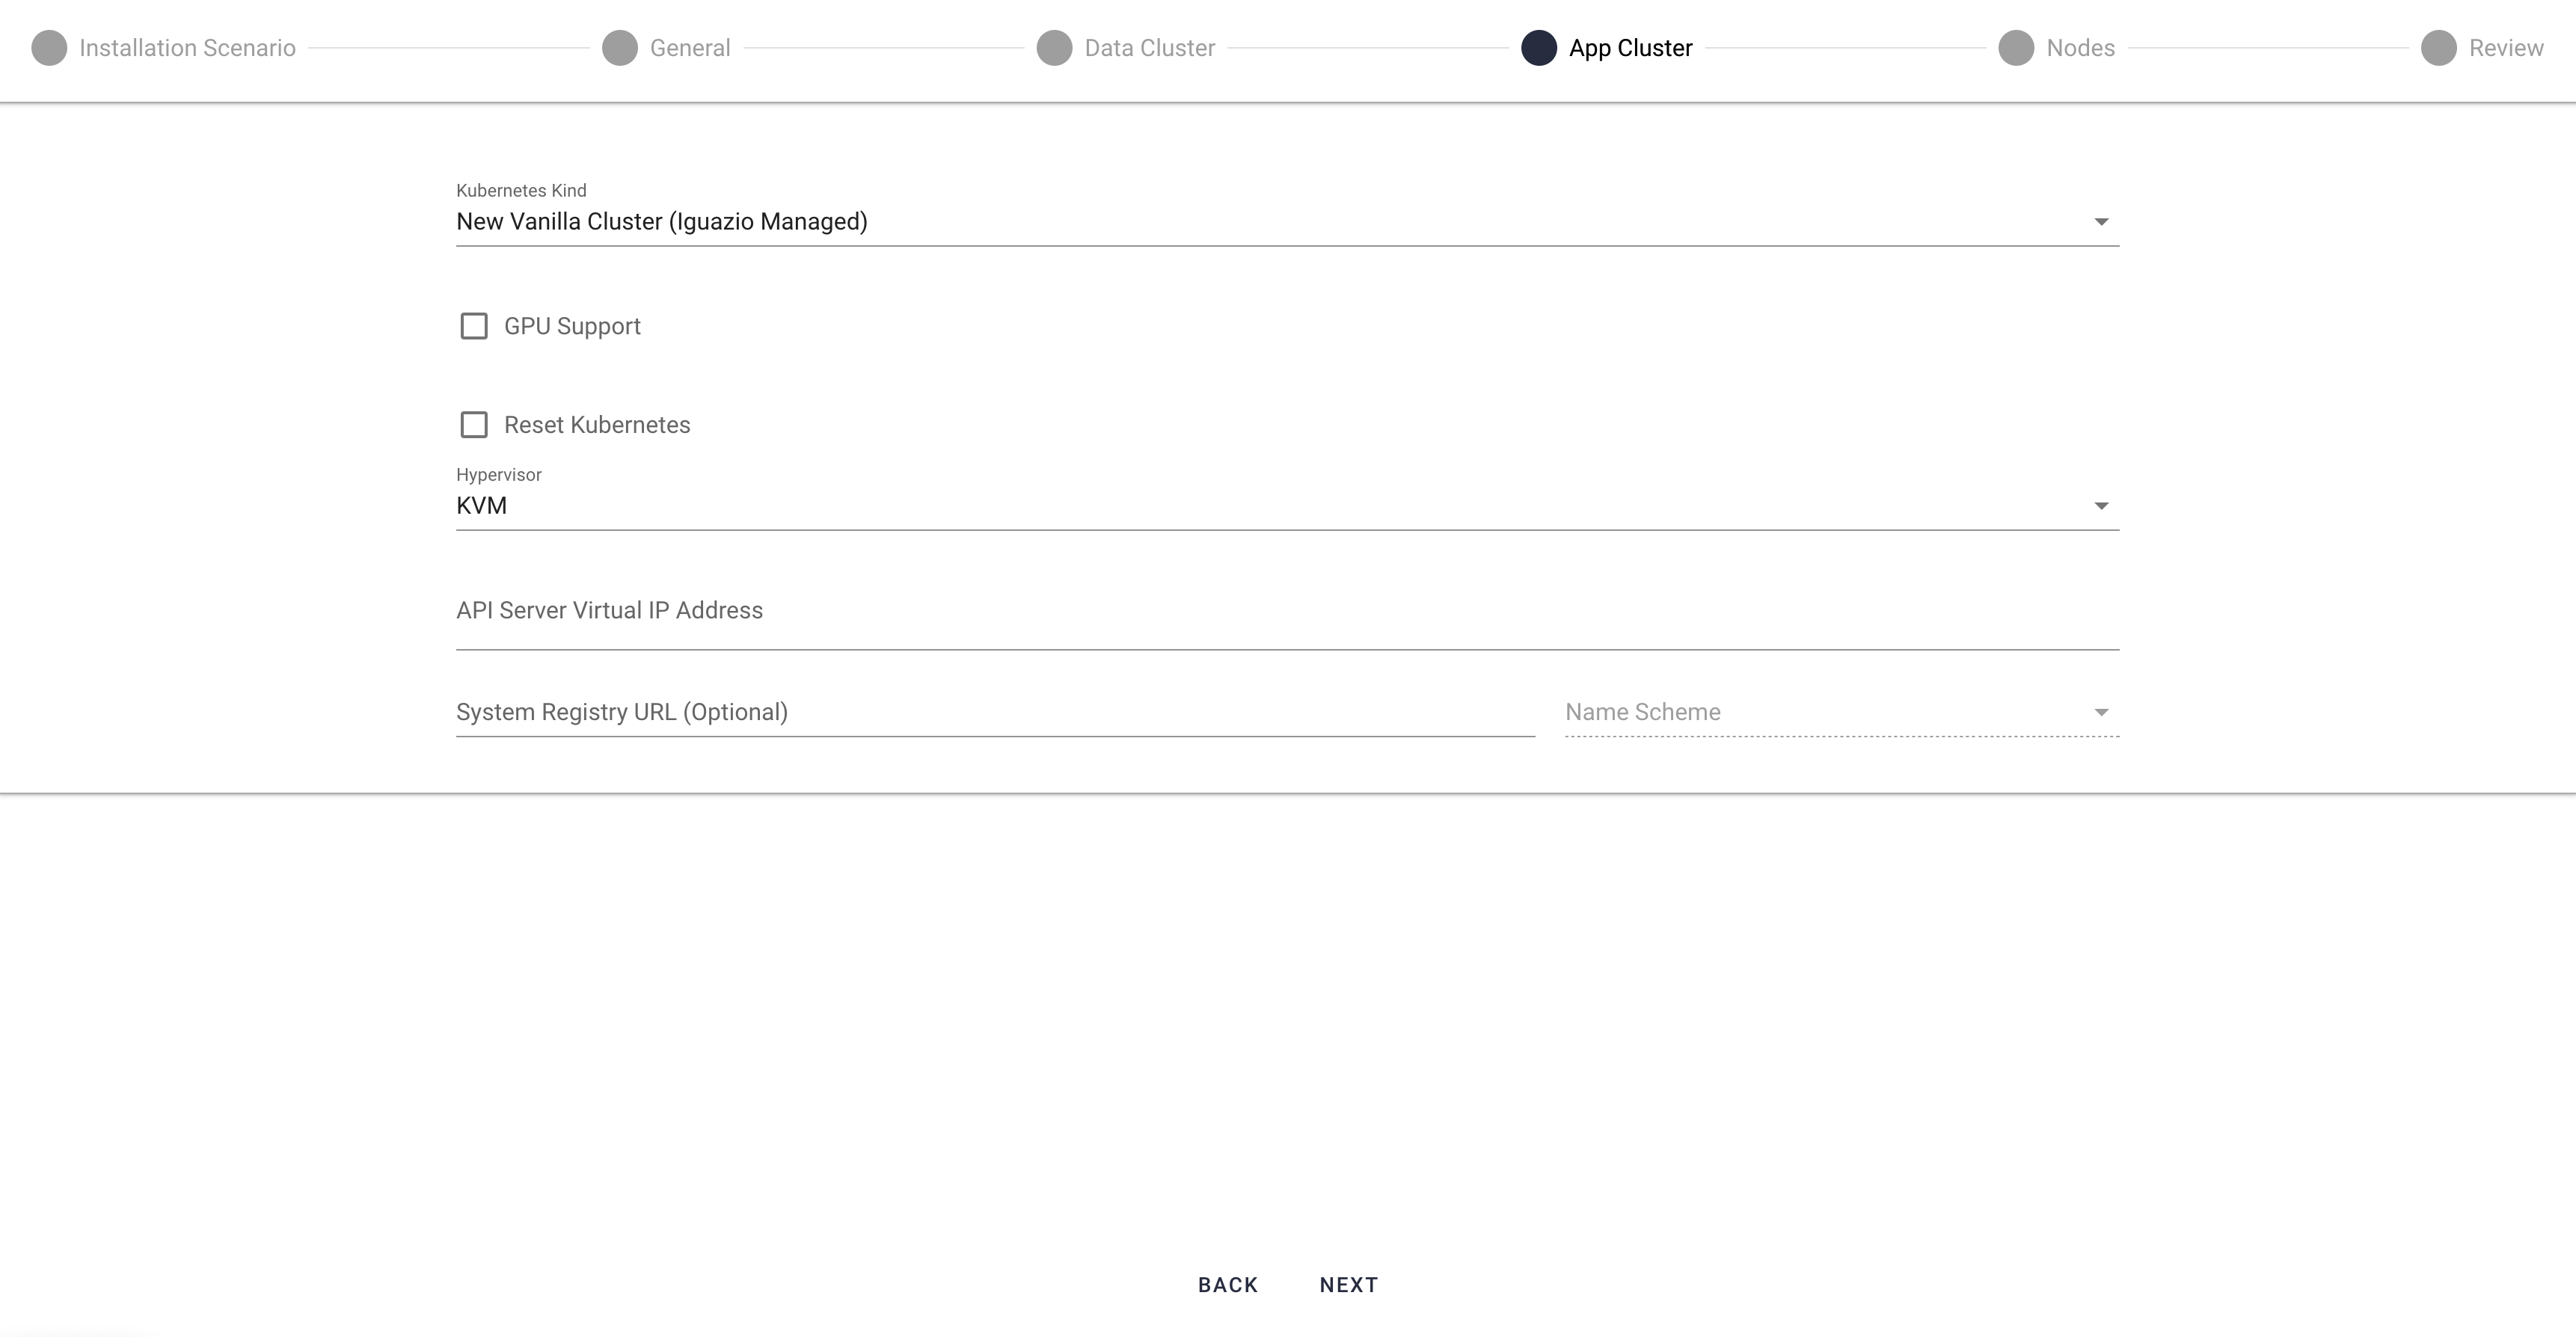
- Kubernetes Kind
-
Leave this set to
New Vanilla Cluster (Iguazio Managed) . - GPU Support
-
Check this option to configure GPU support for the application cluster.
NoteThis option is applicable only when there are GPUs attached to the application nodes.
- Reset Kubernetes
- Select this option to completely remove and reinstall the Kubernetes version (if already installed).
- API Server Virtual IP Address
-
An IP address that is used internally to load-balance access to the API server of the Kubernetes cluster.
Choose an available address from the subnet of the client network.
NoteThis parameter isn't required for platforms with a single application node.
- Use System Registry URL (Optional)
-
Optionally, specify a System Registry to store the files used for installation of your system (mlrun api image, nuclio dashboard image, v3io image, flex-fuse image, etc.)
from a preconfigured registry. (If not specified, the installation uses the datanode registry .) This is useful, for example, in an air-gapped site, or if you simply want to store
your system images on your own registry.
Type in the registry URL, and select the Name Scheme from the drop-down list.
Step 10: Configure Node Parameters
On the
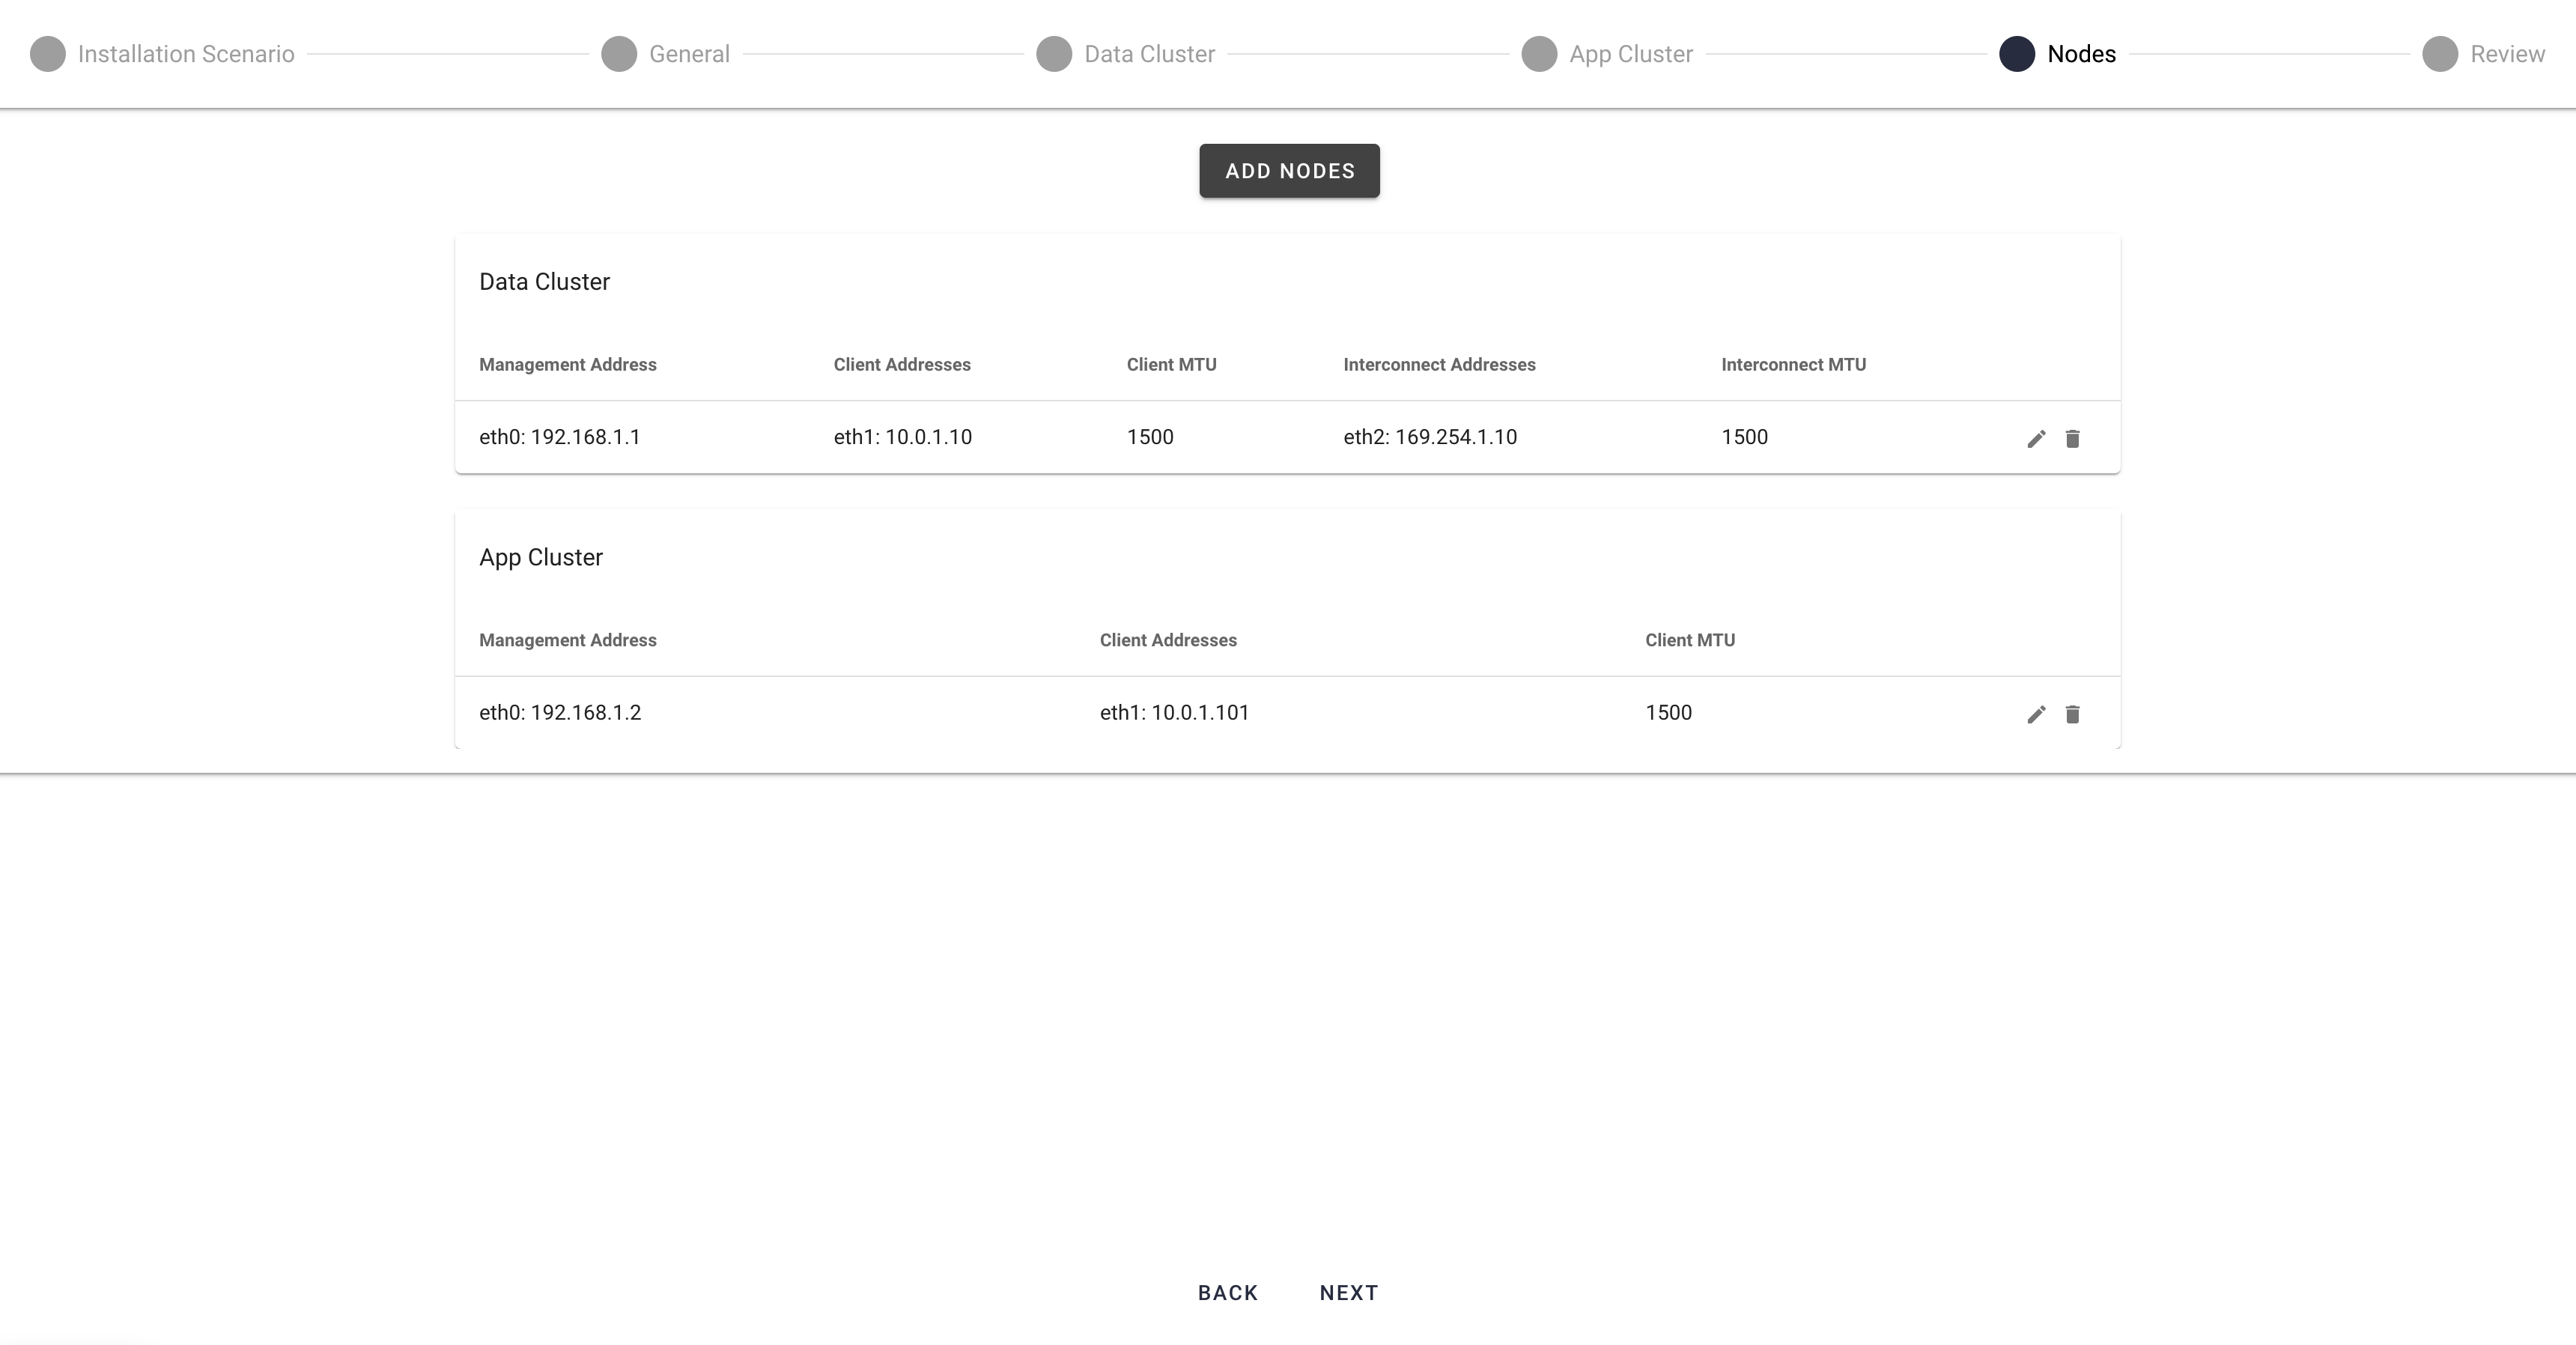
The configuration includes
Add Nodes
Press
Configure the new-node parameters in this window, and then press
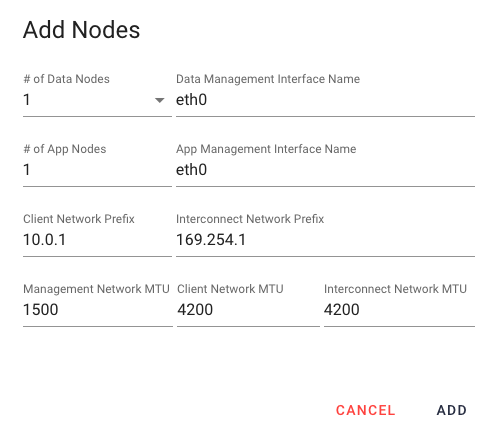
- # of Data Nodes
- The number of data nodes in the platform's data cluster; must be at least 3 to support high availability (HA).
- Valid Values: 1 or 3
- # of App Nodes
- The number of application nodes in the platform's application cluster; must be at least 3 to support high availability (HA).
- Client Network Prefix
- The subnet of the data-path (client) network. Either use the default value or specify a custom private subnet.
- Data Management Interface Name
- Leave this set to
eth0 . - App Management Interface Name
- Leave this set to
eth0 . - Interconnect Network Prefix
- The subnet of the interconnect network. Either use the default value or specify a custom private subnet.
- Management Network MTU
- Leave this set to
1500 . - Client Network MTU
- Leave this set to
1500 . - Interconnect Network MTU
- Leave this set to
1500 .
Configure the Nodes' IP Addresses
On the
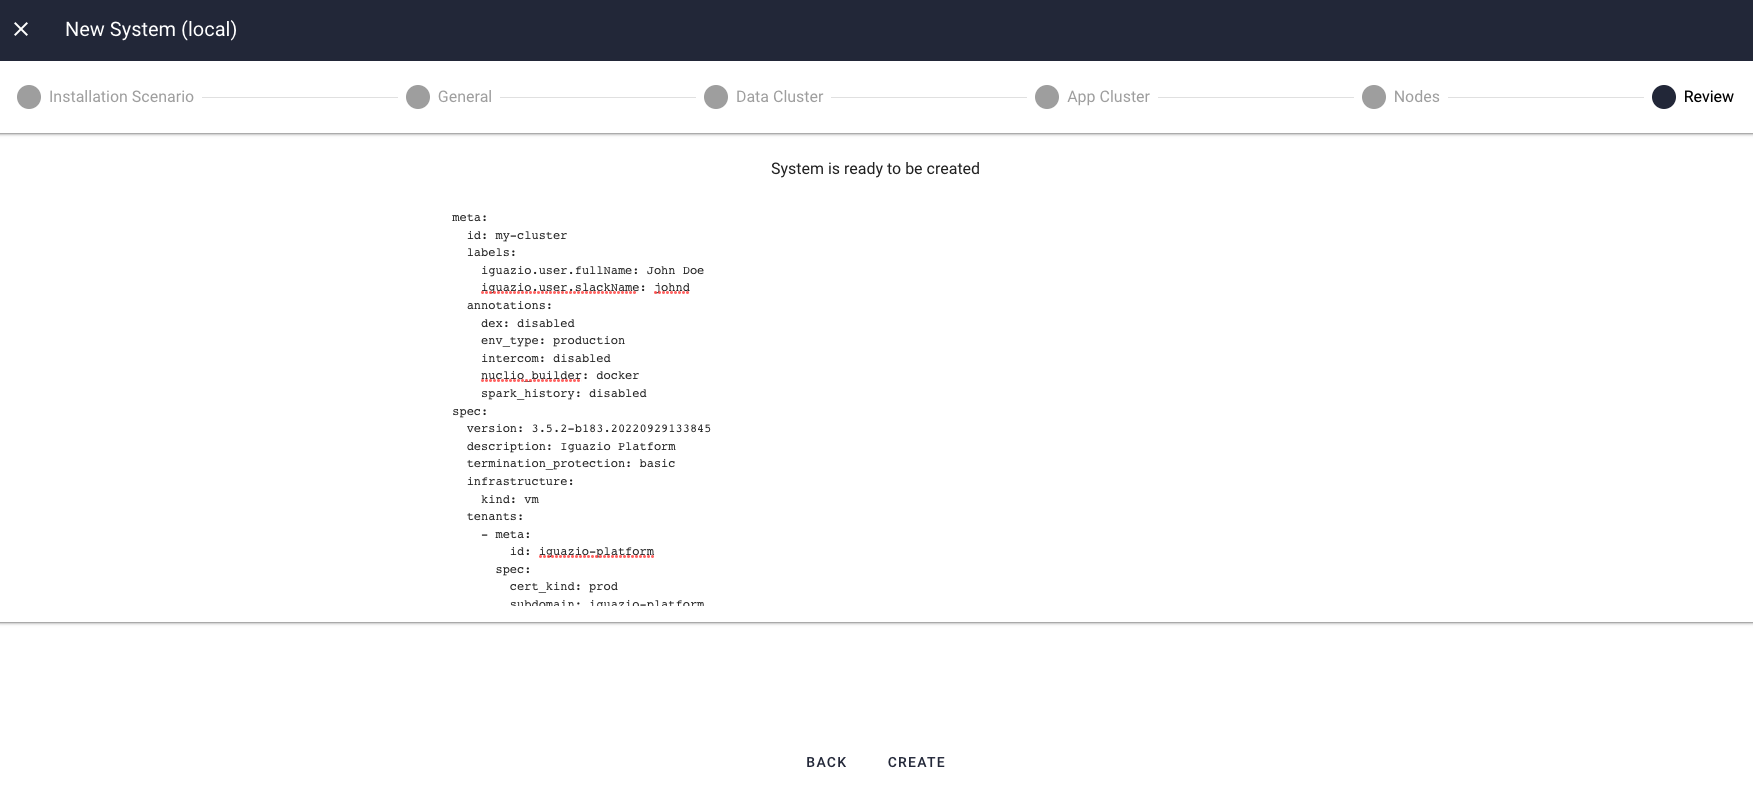
Step 11: Review the Settings
On the
Step 12: Wait for Completion
Provisioning a new platform instance typically takes around 30–40 minutes, regardless of the cluster sizes.
You can download the provisioning logs, at any stage, by selecting
You can also follow the installation progress by tracking the Provazio Docker container logs.
When the installation completes, you should have a running instance of the platform on your vSphere cluster. You can use the Provazio dashboard to view the installed nodes (VMs). Then, proceed to the post-deployment steps.
Post-Deployment Steps
When the deployment completes, follow the post-deployment steps.
If your system is an air gapped system, follow the Air Gapped System Configuration steps.