Creating an AWS IAM Role and Instance Profile
Overview
At times, the platform's EC2 instances need to access the AWS API. For example, to achieve high availability, the instances within a cluster share a single secondary IP address, which is allocated to a specific instance at any given moment. Migrating this secondary IP to another instance requires an AWS API call to update the internal AWS network. To perform an AWS API call, the platform must be authenticated using AWS credentials with the necessary permissions for performing this operation. To allow this, the platform installer needs to receive the name of an AWS instance profile that contains an IAM role with the required permissions.
This guide walks you through the steps for creating the required IAM role for the platform installation, using the AWS Management Console. When using the console to create a role for Amazon EC2, the console automatically creates an instance profile with the same name as the role. You'll need to provide this name as part of the platform installation, as outlined in the platform's AWS cloud installation guide.
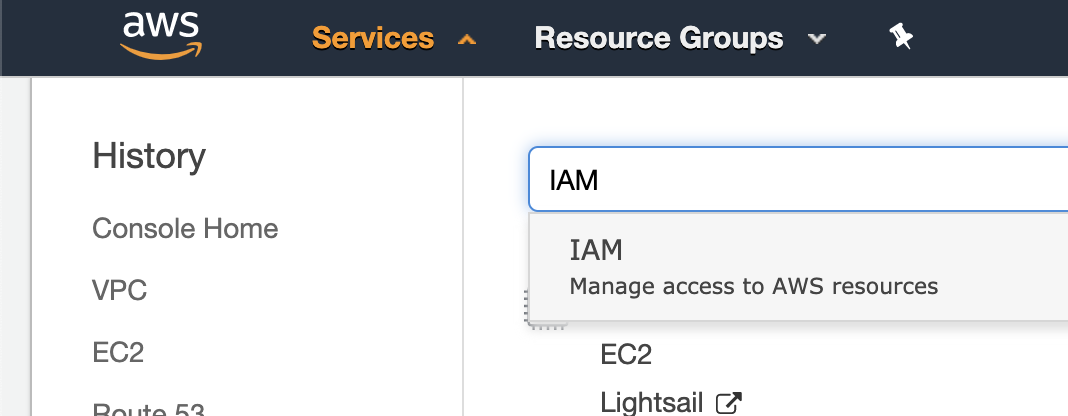
Step 1: AWS Login
Log into your AWS Management Console and select the IAM service.
Step 2: Create a New Role
In the side navigation menu, select 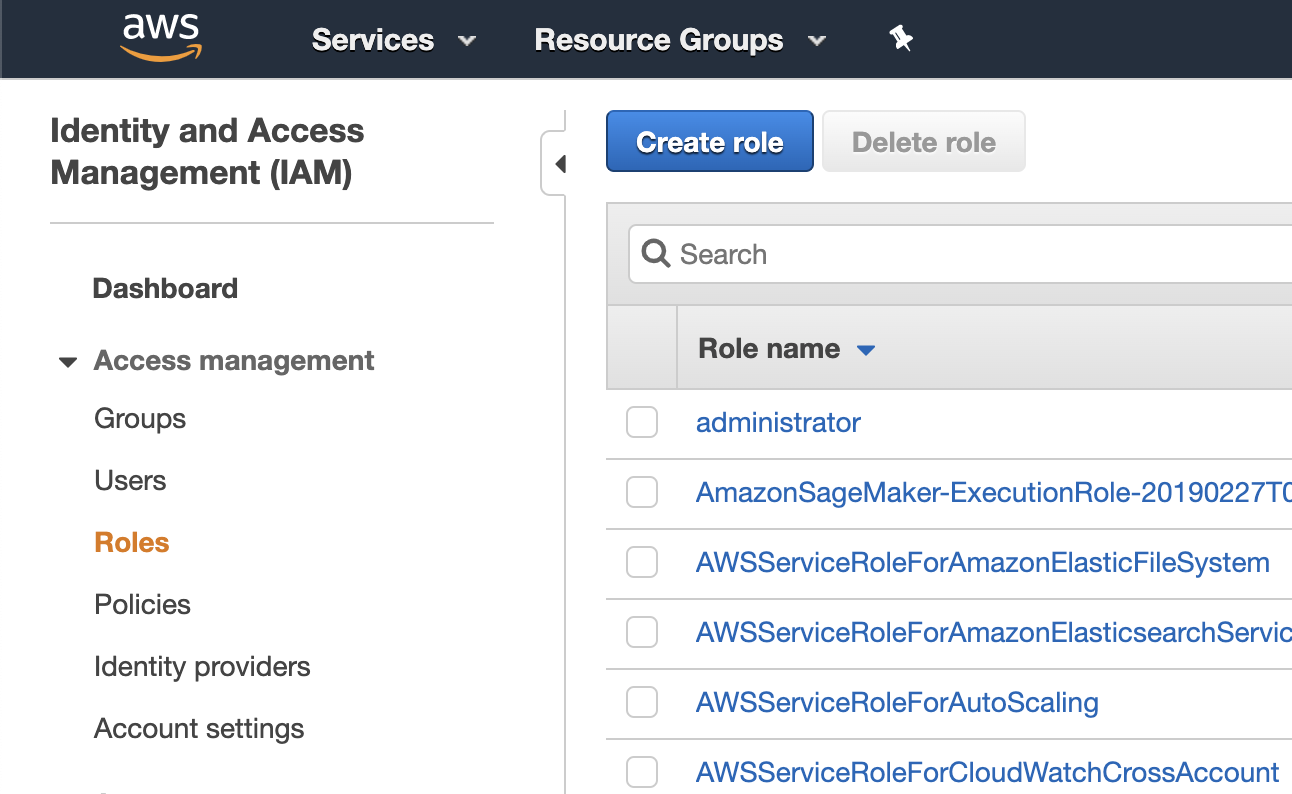
Step 3: Select the AWS EC2 Use Case
Select the 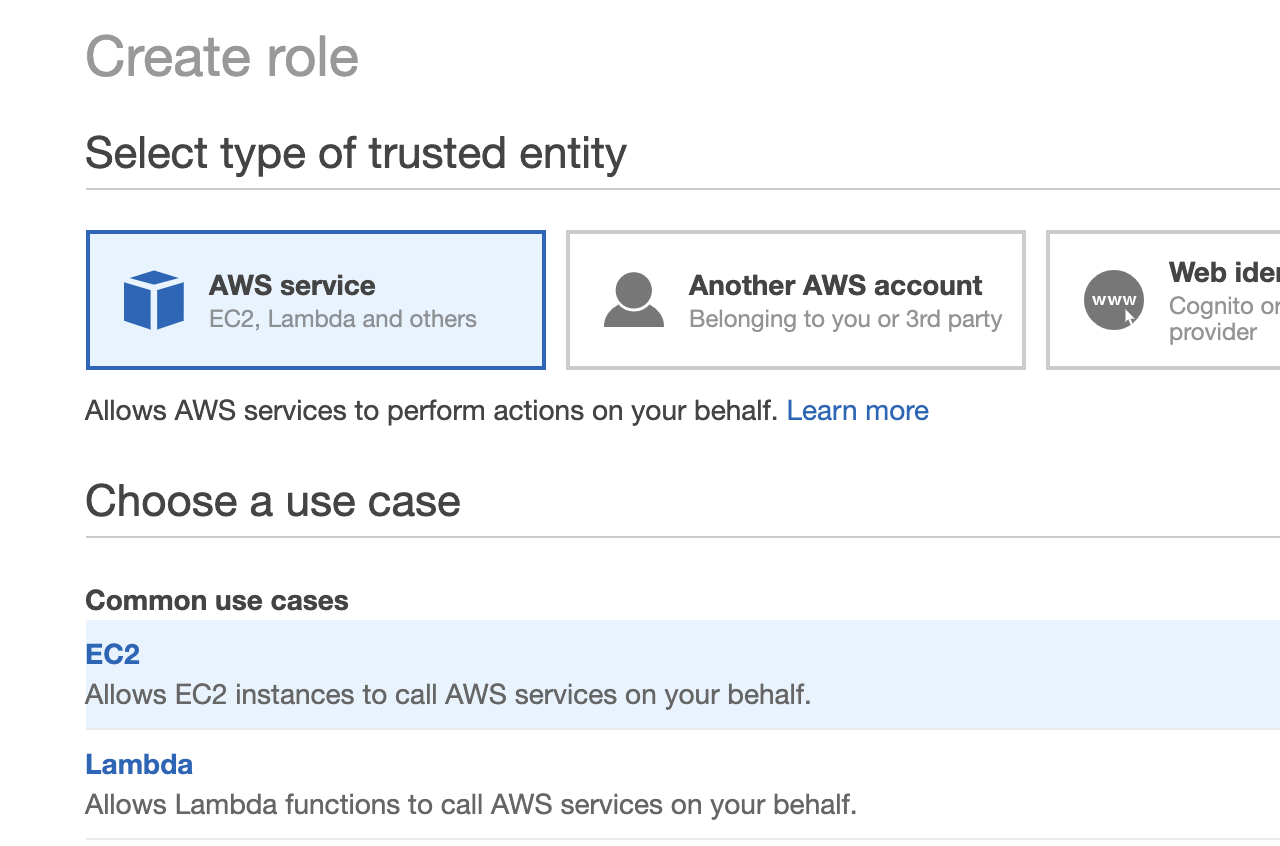
Step 4: Create a Policy
Select 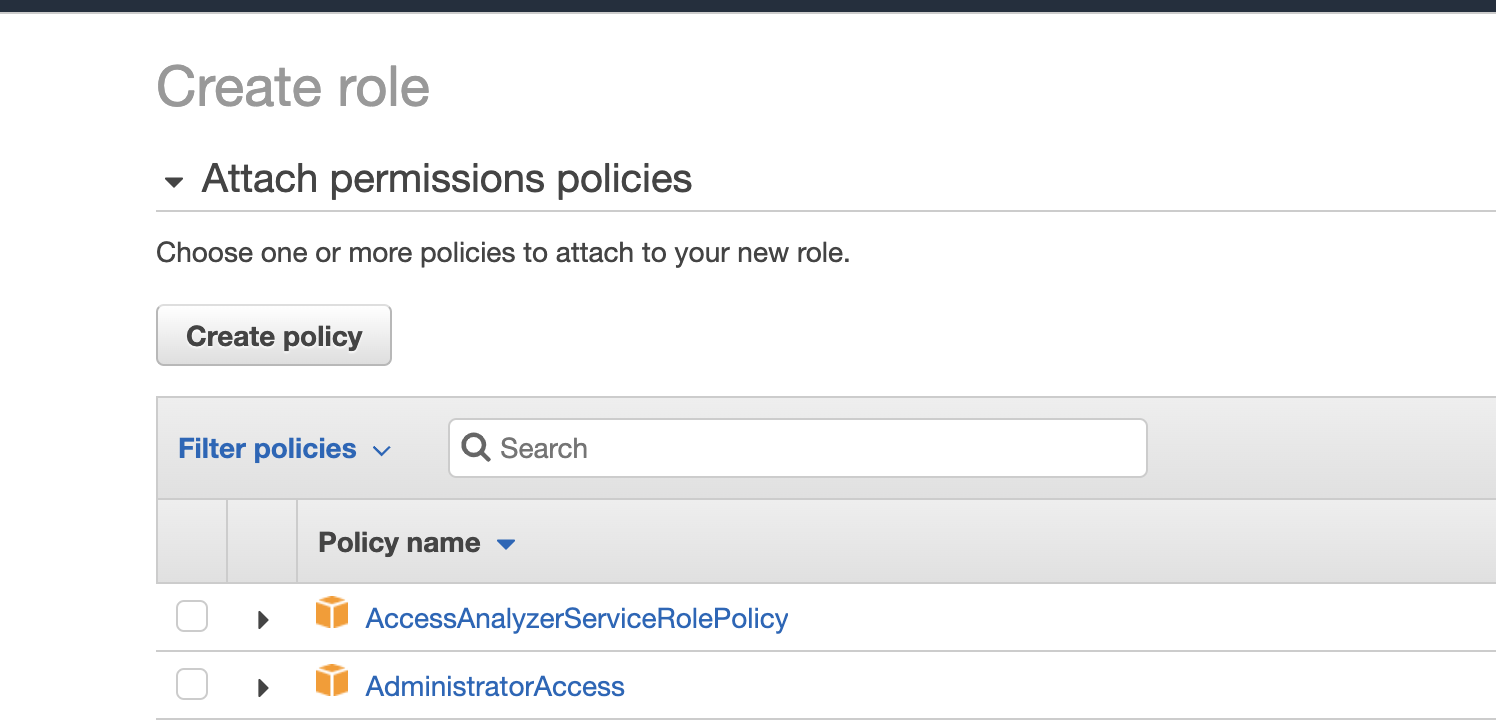
Under the 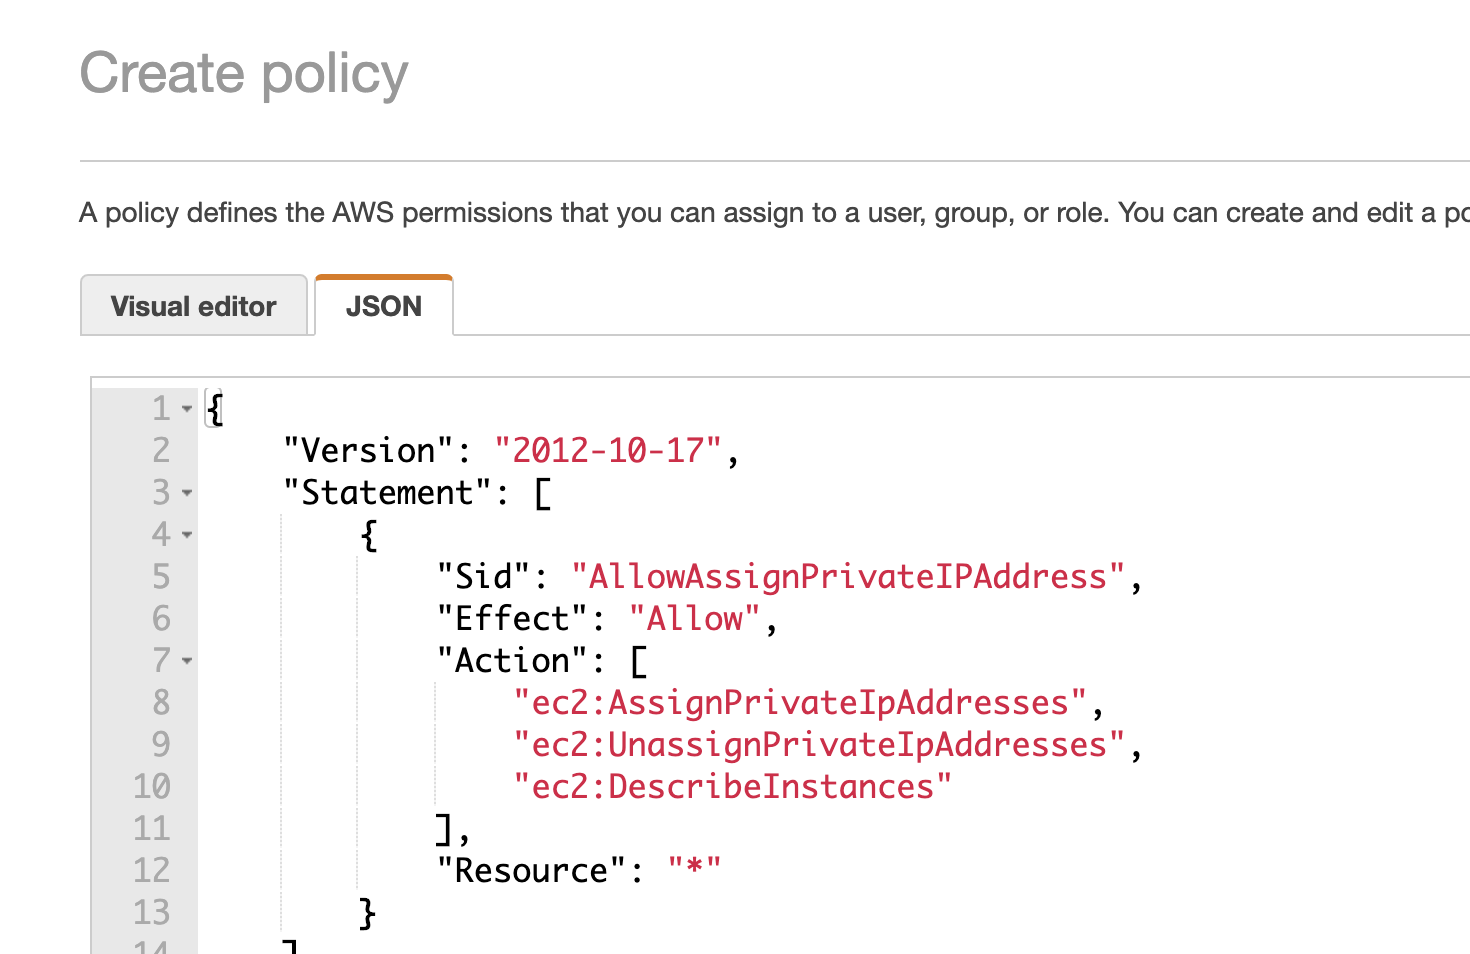
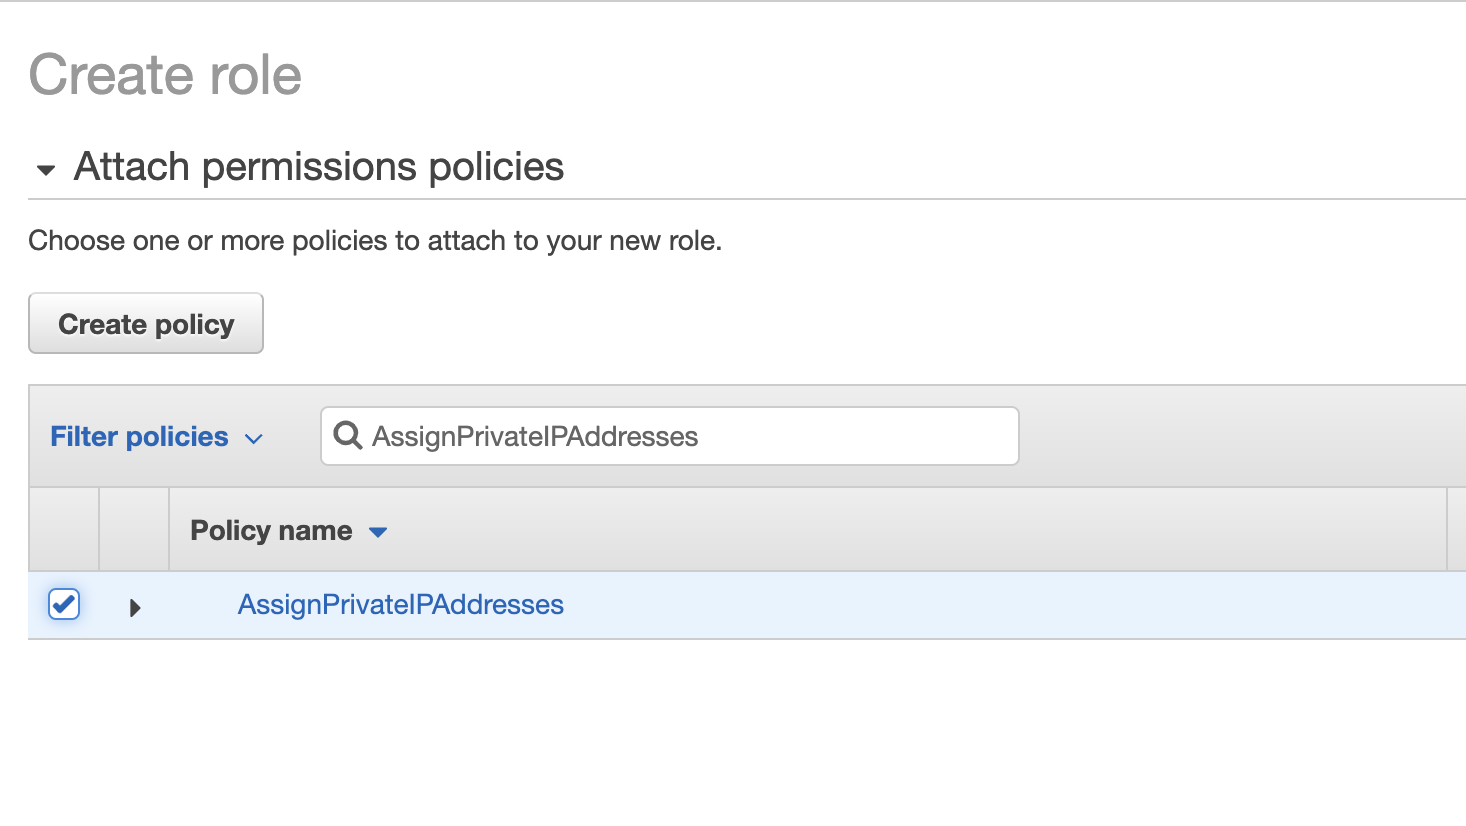
Step 5: Create the Role
Filter the policies for the name of the policy that you created and select the policy.
Enter "IguazioDataScienceNode" as the role name, optionally add a description, and select
Additional Resources
- Creating IAM Roles (AWS documentation)